---
updatedAt: 2025-09-22T16:51:33.000Z
---
Fetch the complete documentation index at: https://docs.rainforestpay.com/llms.txt. Use this file to discover all available pages before exploring further. Append .md to any documentation page URL to get its markdown version.
# Webhooks
Configure Rainforest to send webhook notifications for any payment, merchant, or deposit events
Rainforest utilizes webhooks to notify the platform when an event occurs, which indicates a change of status on a resource in the Rainforest ecosystem.
You can subscribe to events for the following resources:
# Configure webhooks
***
Webhooks are configured in the [Rainforest Platform Portal](https://platform.sandbox.rainforestpay.com) on the **Webhooks** tab.
## Create the webhook endpoint
Add an endpoint by entering the URL to receive the webhooks and choose specific events to subscribe to or subscribe to all events.
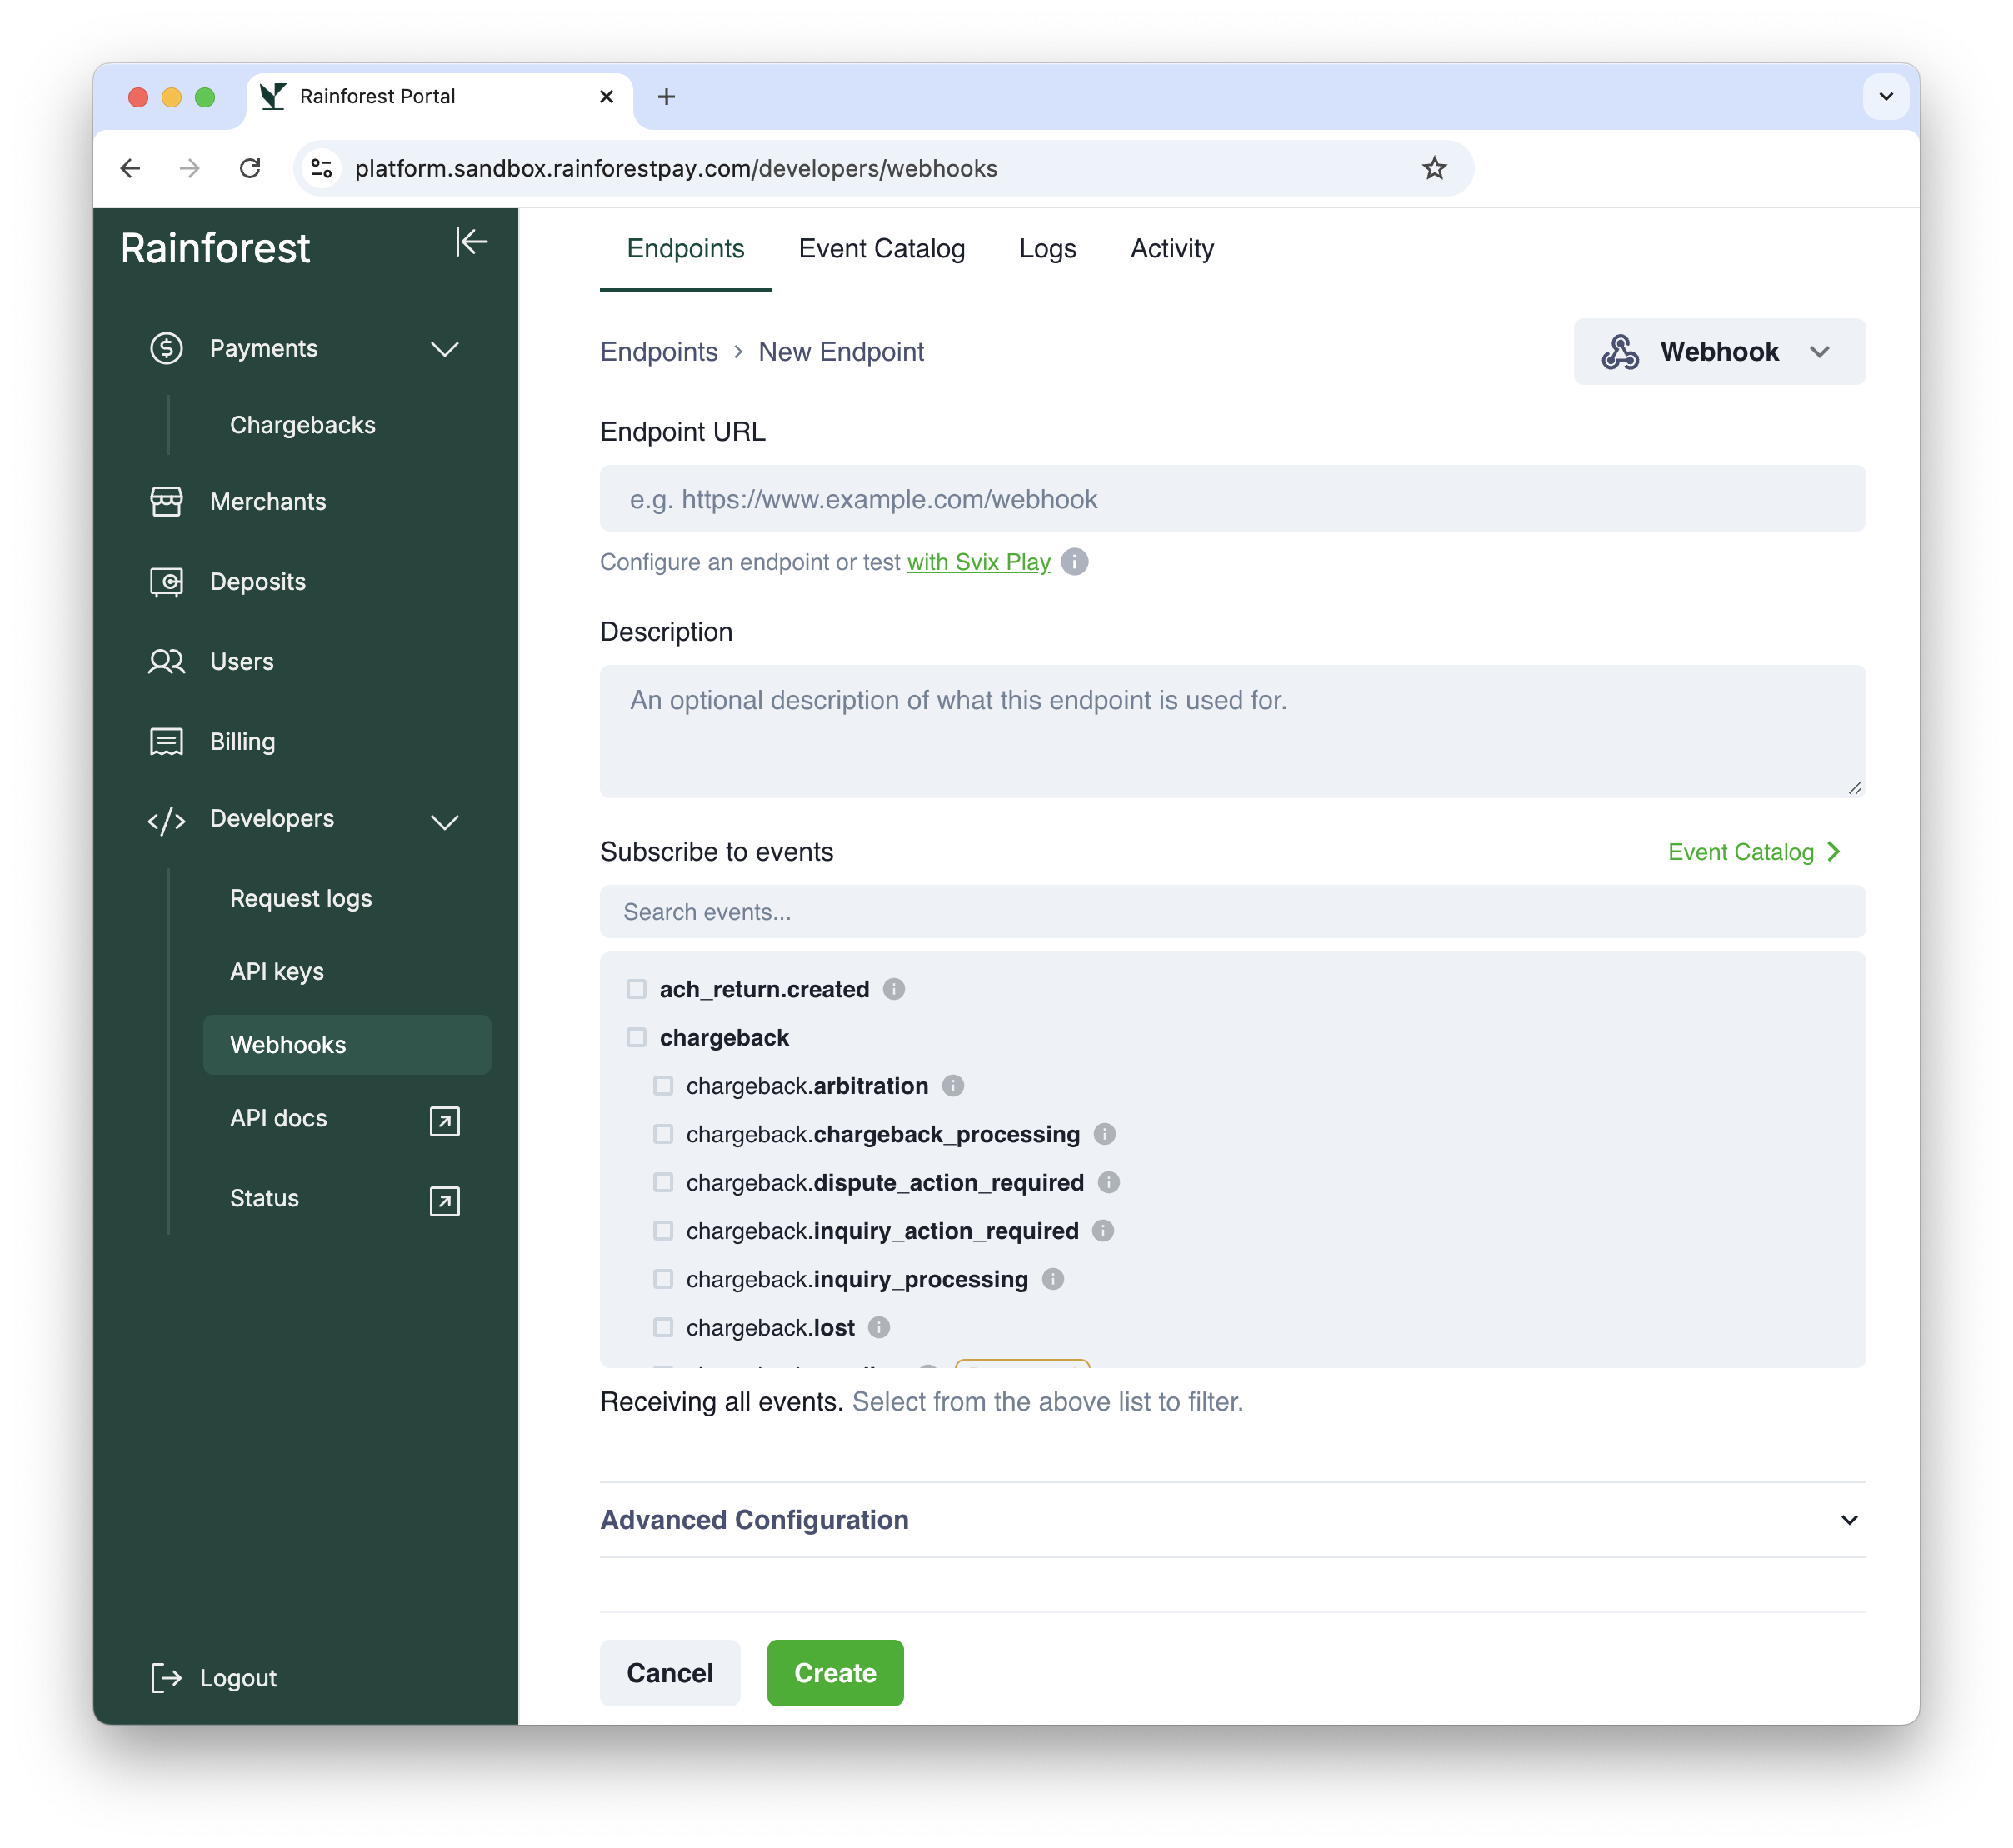
Creating a Webhook Endpoint
## Receive the webhook payload
Every webhook payload will include a `data` and `event_type` field.
```json
{
"data": {
...
},
"event_type": "payin.processing"
}
```
The `event_type` includes the Rainforest resource that represents the `data` payload and the event that occurred on the resource in the format of `{resource}.{status}`.
Your endpoint must check the `event_type` to parse the data payload. The `data` payload includes all fields returned by the GET endpoint of the corresponding resource.
For example, the `payin.processing` event will have a `data` payload that includes all fields returned by the [get payin](https://docs.rainforestpay.com/reference/get_payin) endpoint.
## Validate the webhook
To ensure the webhooks you receive from Rainforest are valid, we sign each request with a signing key, unique to your account. It can be found on the right side of your endpoint configuration.
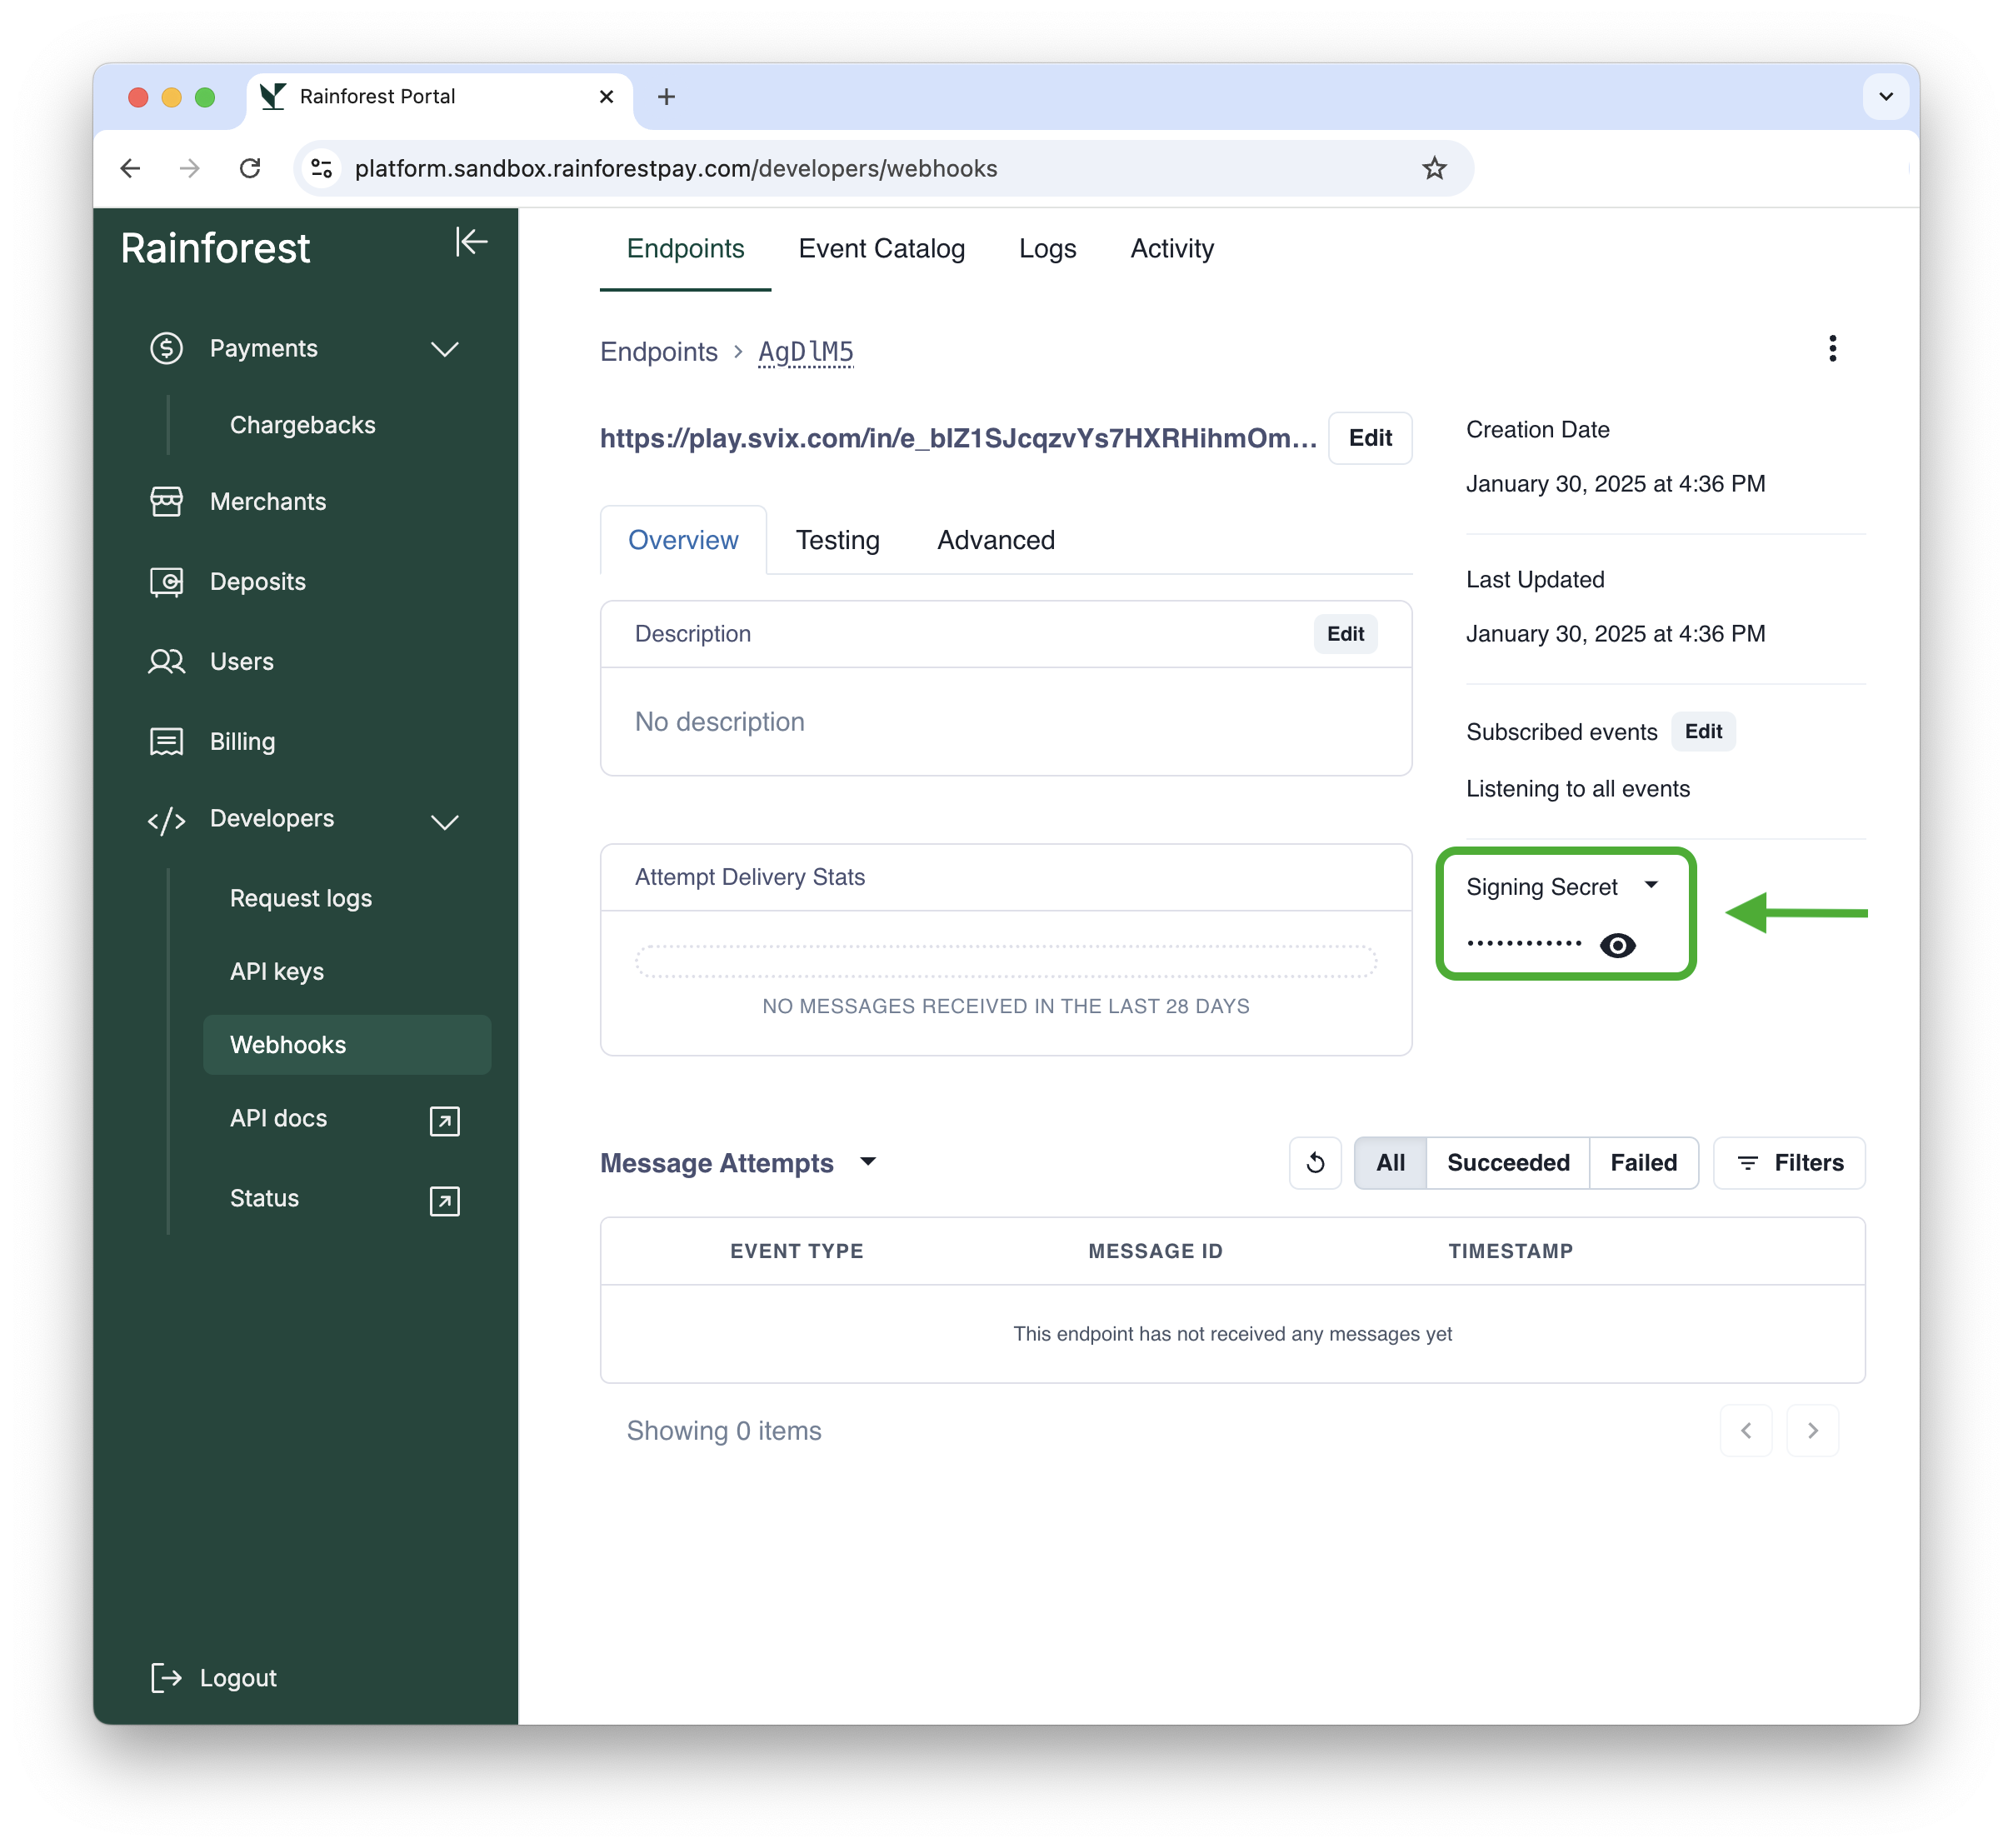
Webhook Signing Key in Portal
It's important that you verify the authenticity of the webhook to ensure it's originating from Rainforest.
Head over to the Verify Webhooks recipe for an explanation on how to validate the webhook signature.
## Webhook source IP addresses
All webhooks are sent from the following IP addresses:
```
44.228.126.217
50.112.21.217
52.24.126.164
54.148.139.208
```
# Webhook retry behavior
***
In order to give your application the best chance at ingesting webhooks from Rainforest, we will attempt to deliver a webhook until a successful response is received.
## Retry schedule
These attempts will perform an exponential backoff over a period of approximately 28 hours until either a successful response is received, or all attempts are exhausted. Attempts are based on the following schedule, where each period is started following the failure of the preceding attempt:
* Immediately
* 5 seconds
* 5 minutes
* 30 minutes
* 2 hours
* 5 hours
* 10 hours
* 10 hours (in addition to the previous)
For example, an attempt that fails three times before eventually succeeding will be delivered roughly 35 minutes and 5 seconds following the first attempt.
## Indicate a successful response
A successful response is denoted by any `2XX` HTTP status code. You should return a `2XX` response within 15 seconds. Any other status codes are treated as failures and the retry schedule will begin.
## Failed events
If all attempts to deliver the webhook fail, the message attempt is marked as `Failed` and a webhook type of `message.attempt.exhausted` will be sent to notify you of this error.
## Disabling failed endpoints
If a particular endpoint has all attempts return non `2XX` status codes for 5 consecutive days, the endpoint will be automatically disabled.
## Manual retries
Webhooks can be replayed within the Portal by replaying a single event or failed events over a time period.
### Replay a single event
Replay a single event by navigating to the specific message attempt.
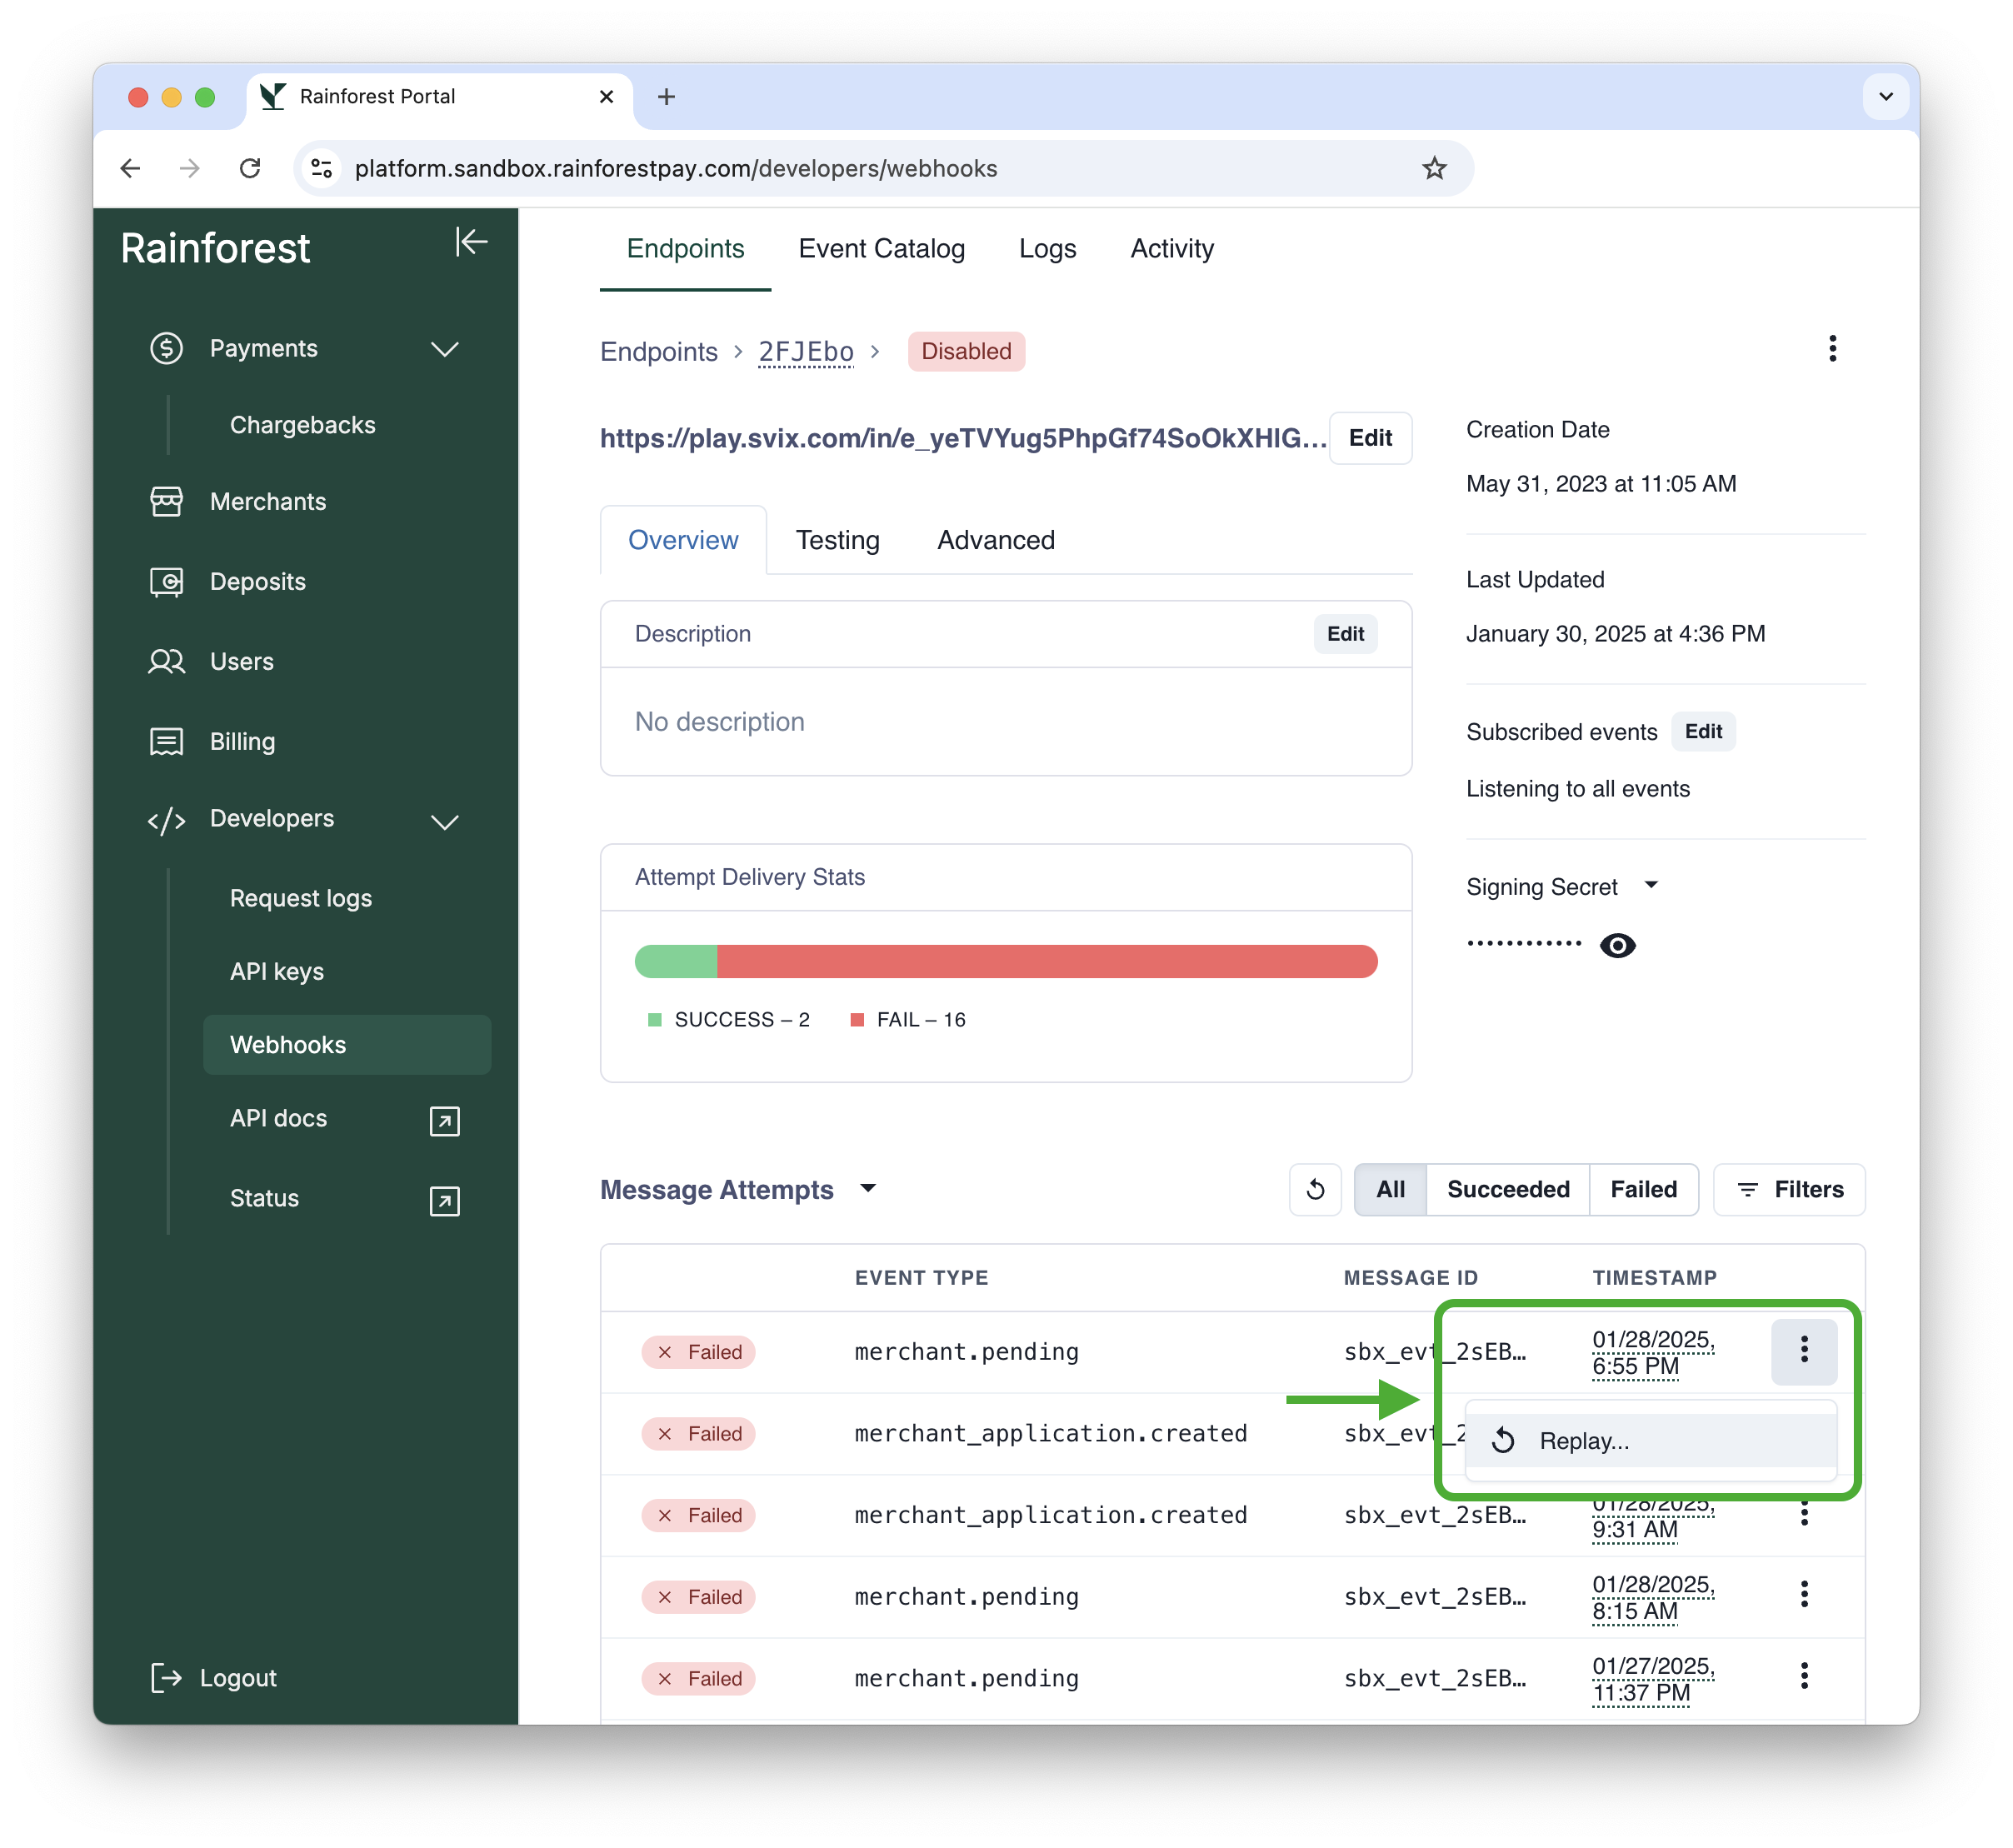
Replaying a Single Webhook Event
### Replay all failed events
Replay all failed messages over a specific time period up to 2 weeks ago.
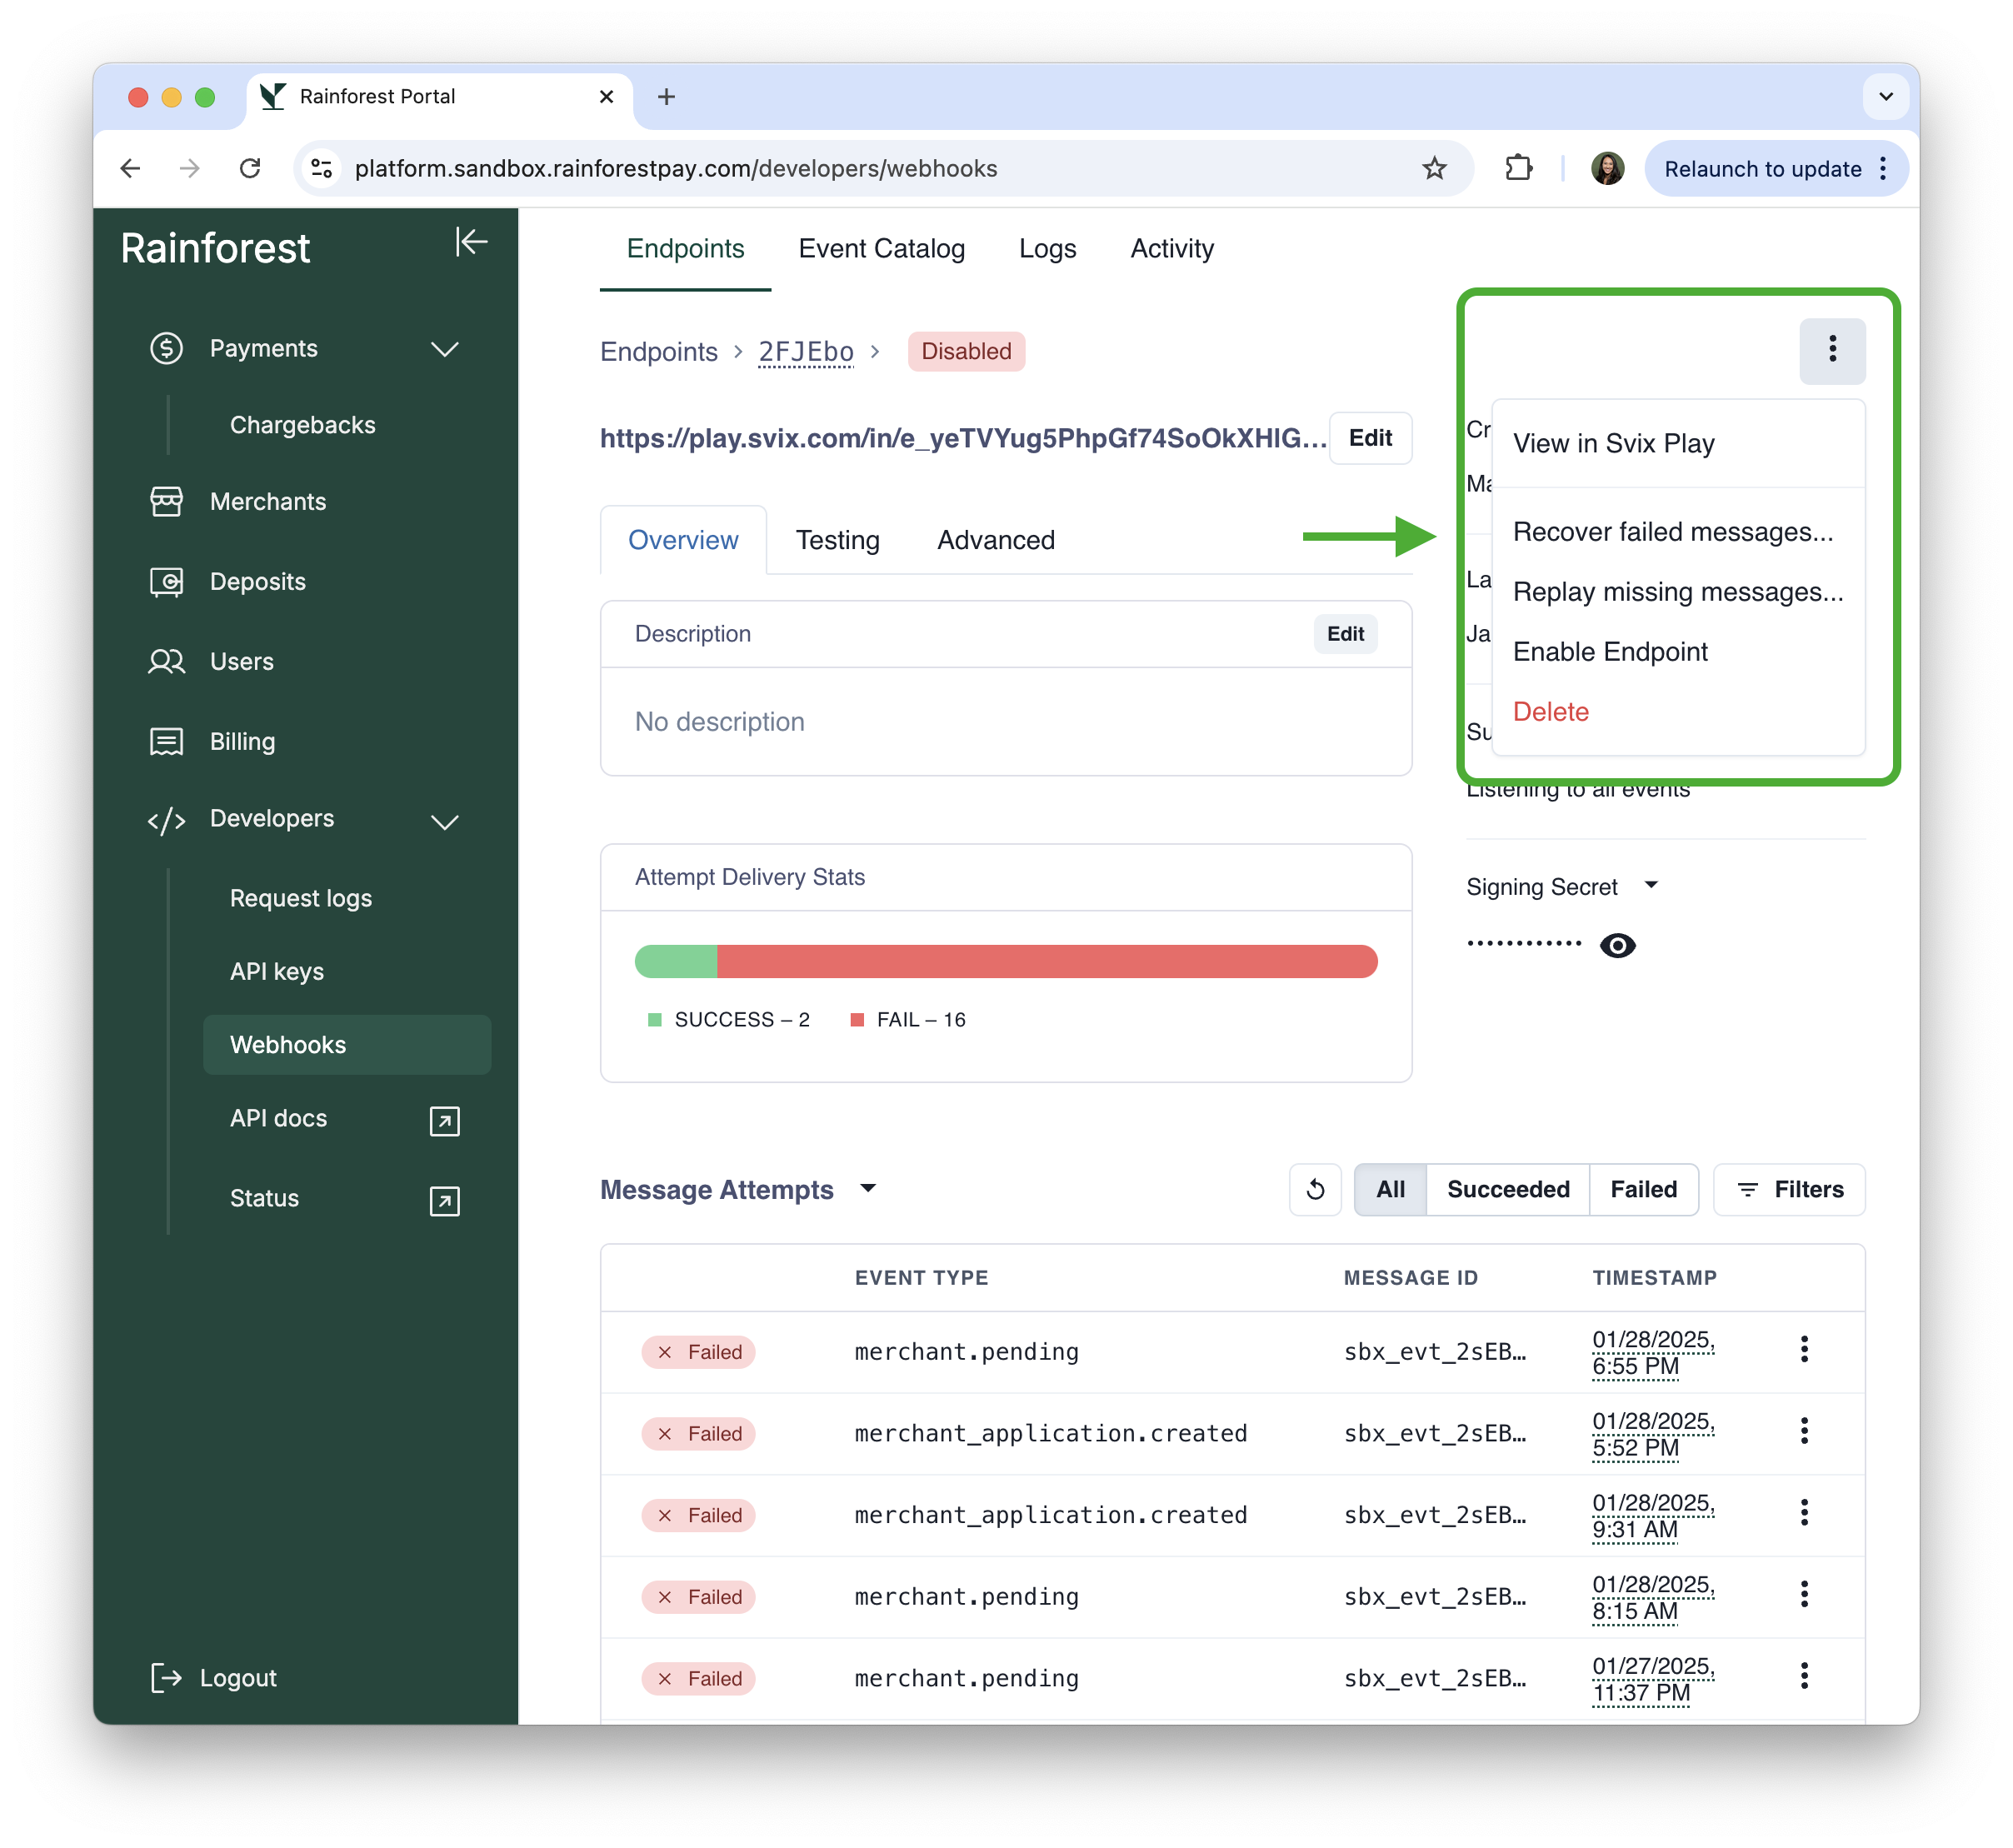
Recovering Failed Webhook Messages
# Webhook rate limiting
***
Rainforest can handle delivering webhooks at high volume. However, a rate limit can be configured on your webhook endpoints to not overload your system.
A rate limit can be set on the "Advanced" tab within the endpoint configuration. The rate limit is the number of events per second to send to the endpoint. After the limit is reached, messages to the endpoint will be throttled to keep a consistent rate under the limit.
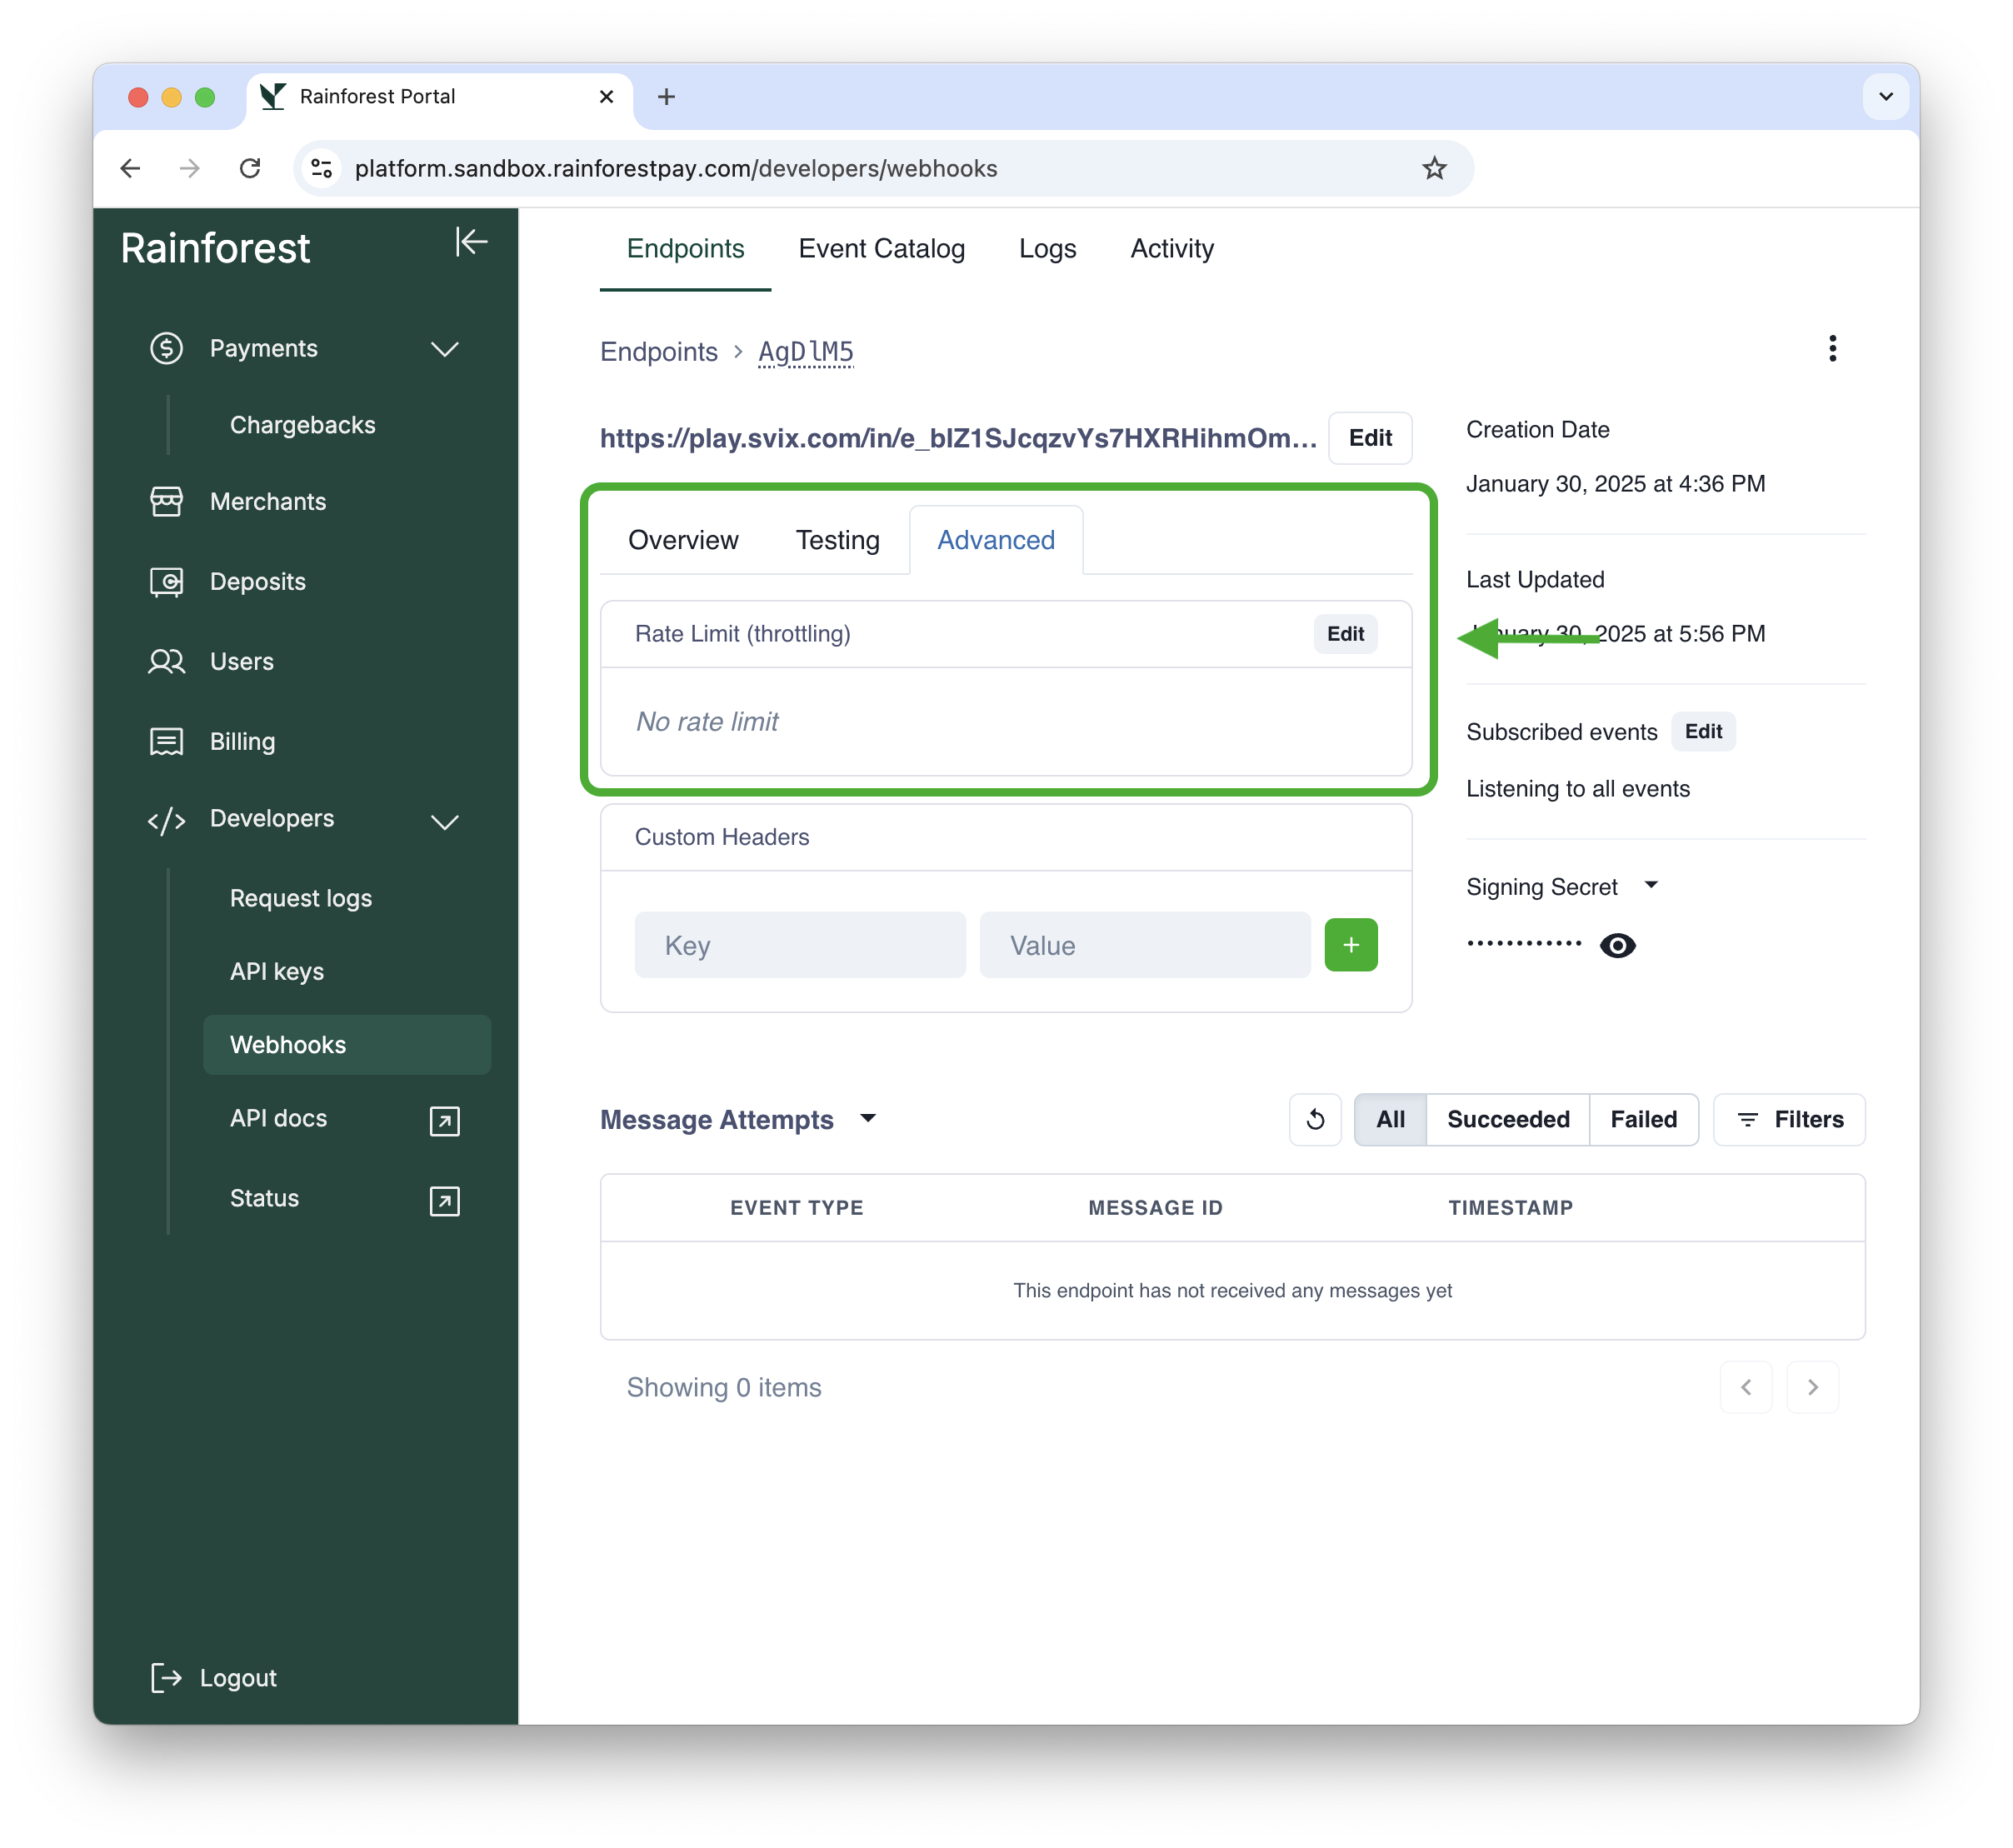
Configuring Webhook Rate Limiting
Rate limiting should be used as a protection on your system from sudden peaks in high traffic. With rate limiting, these peaks can be spread over multiple seconds, ensuring your system is not overloaded.
One important thing to remember with rate limiting, is that if you are limiting to 1,000 webhooks per second and are consistently receiving webhooks over that limit (e.g. 2,000 per second), the queue will get congested and the receiving of webhooks to your endpoint will have infinitely increasing delays.