Process payins via Component
Embed the Payment Component in your platform to process payments
Once your merchant is onboarded and active, they can begin processing payments. The payment component collects sensitive payment data from your user without exposing your platform to the sensitive payment data - increasing security and decreasing PCI DSS scope.
Our components are configurable, embeddable web components designed to simplify your integration to Rainforest while retaining your platform's look and feel and control of your merchant and user's experience.
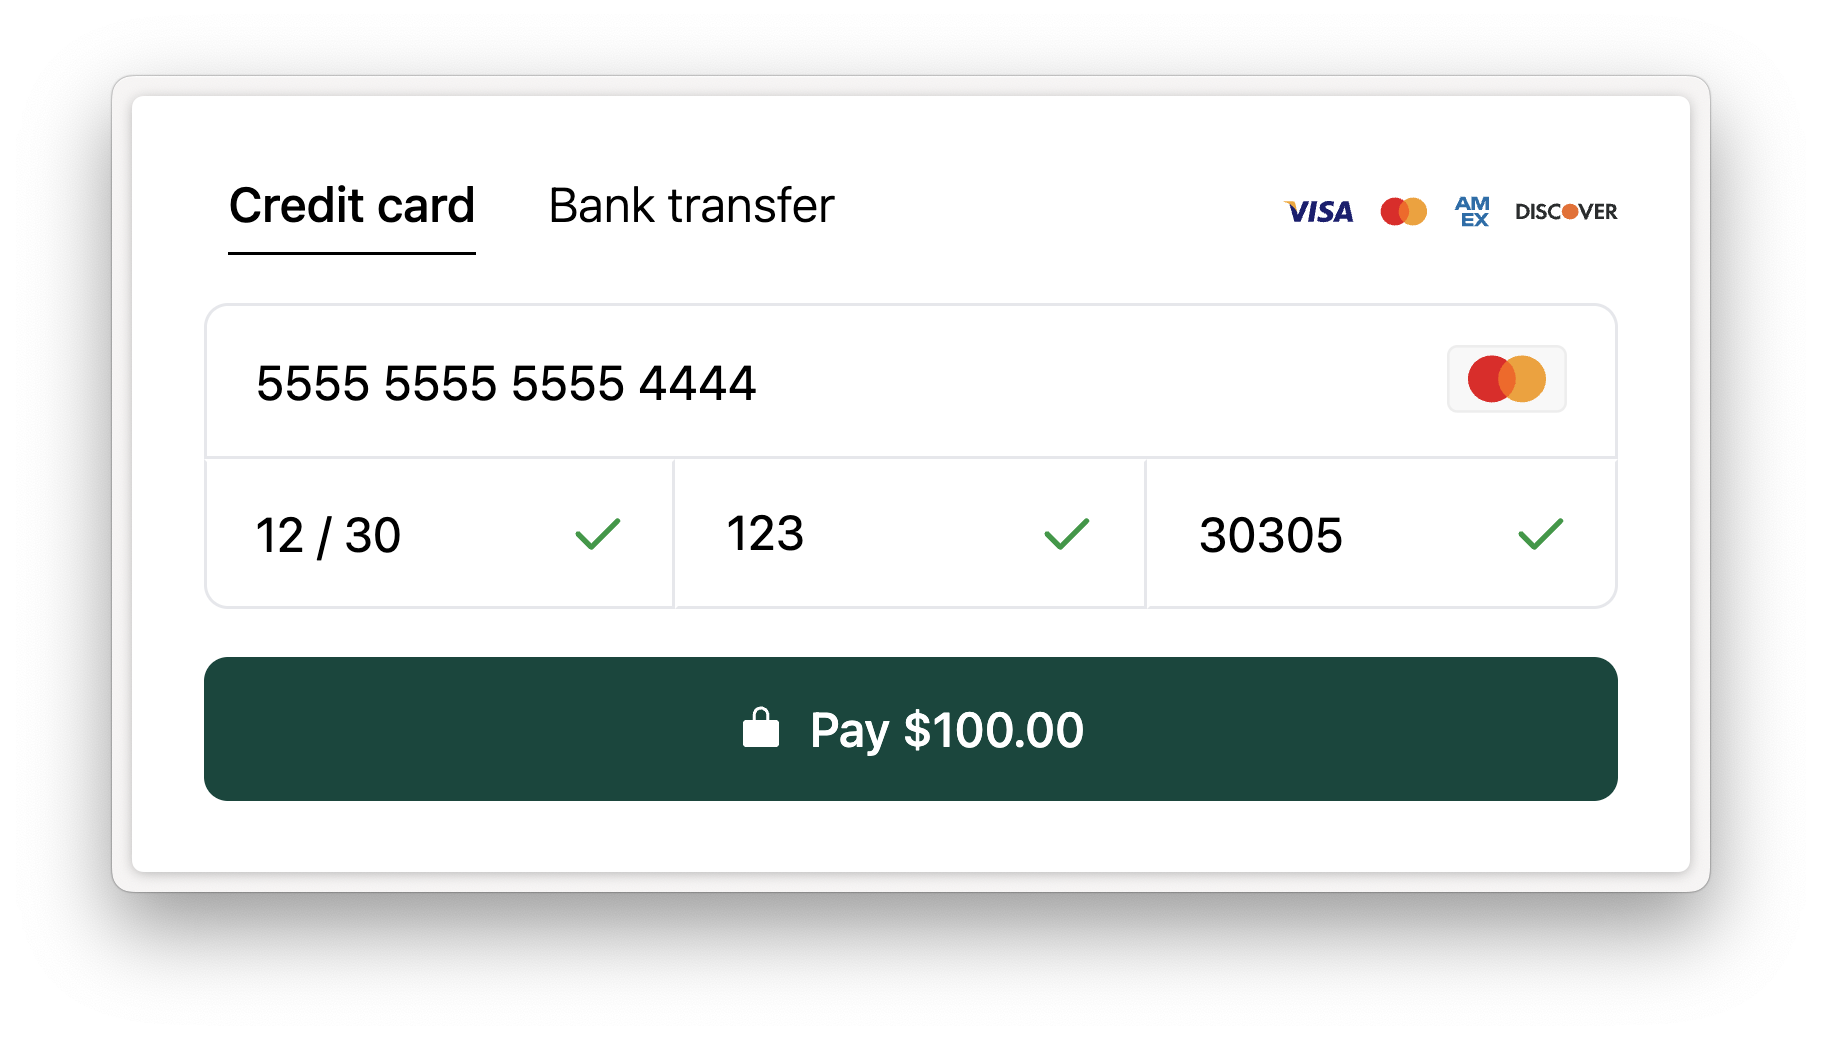
The Payment Component can process a payin for a specific amount with various payment method options, such as credit card or bank transfer, and store the payment method for future use. The component can also be embedded to only store a payment method. This guide will explain how to integrate the Payment Component to process payins.
Processing payins involves three steps:
- Create a payin config via the Rainforest API to send information in advance about the payin (amount, user billing contact, metadata, etc.)
- Embed the Payment Component into your website
- Add an event listener on the payment component to store the payin identifier
Create the payin config
First, create the payin config to configure a payin with information, such as an amount and billing contact, before collecting the sensitive payin details (i.e the card number) via the Payment Component.
A payin config can only be associated to one successful payin. If the payin fails to process, the same payin config can be used to retry processing the payin.
Billing contact
Rainforest requires certain billing contact fields to process a payin. The requirements are dependent on the payment method. For a Card payin, the postal code is required. For an ACH payin, the name is required.
If the billing contact is provided in the payin config, then billing contact fields in the payment component will be pre-filled.
If the billing contact is not provided in the payin config, then the payment component will ask for the required fields to process a Card or ACH payin.
Metadata
You can define arbitrary metadata in the payin config to save on the payin. Metadata is a valid JSON key-value object. Keys of the metadata are queryable on the list payments endpoint by providing valid JSONPath to the key.
You can also define arbitrary method_metadata in the payin config to save on the payment method that gets stored when a payin is processed. The method metadata will be associated to all payins processed on the saved payment method.
Do not pass sensitive information (e.g. social security numbers, protected health information, etc.) in metadata.
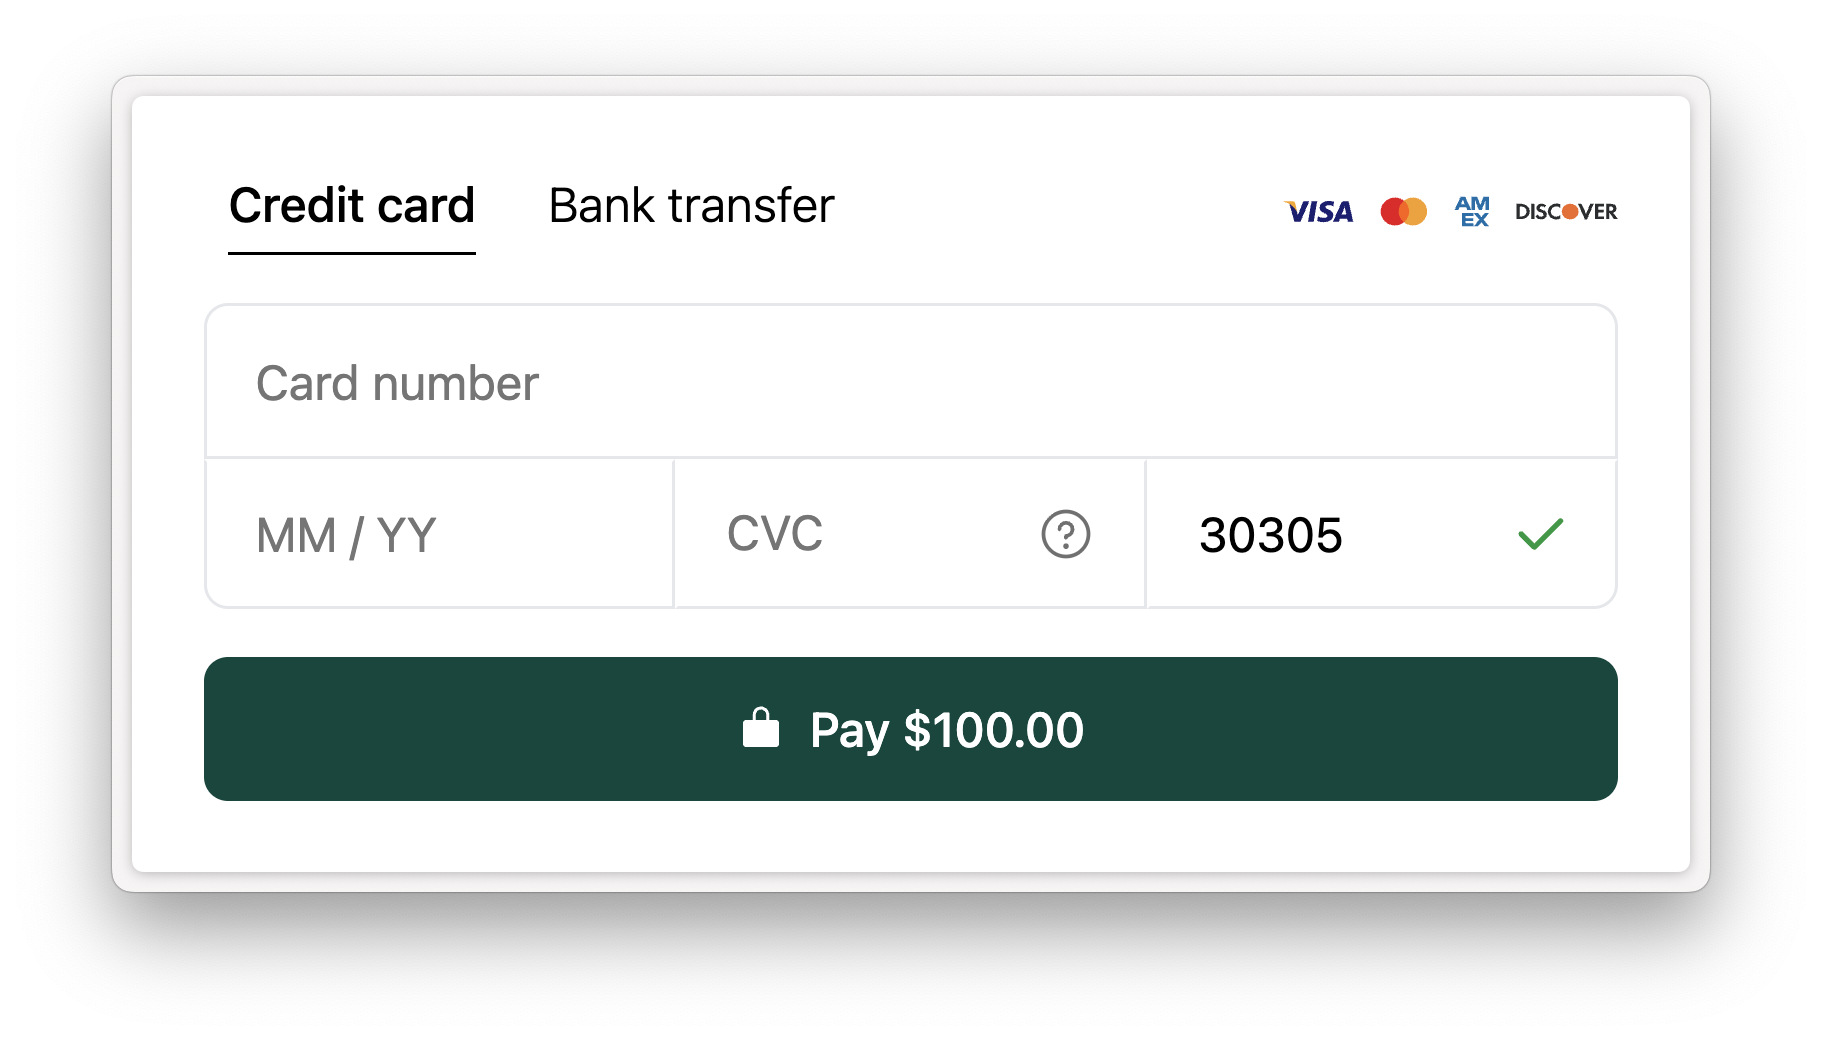
Embed the payment component
The next step is to show Rainforest's payment component for the user to input their payment method details and process the payin.
Session authentication
The page where you host the component should be secure and authenticated, so that you are sure the current user is authorized to process the payin.
Create a session to grant the payment component permissions to create a payin and pass the session_key into the payment component. The session should include at least the following statement:
curl --location 'https://api.rainforestpay.com/v1/sessions' \
--header 'Content-Type: application/json' \
--header 'Authorization: Bearer {{api_key}}' \
--data '{
    "ttl": 86400,
    "statements": [
        {
            "permissions": ["group#payment_component"],
            "constraints": {
                "merchant": {
                    "merchant_id": "REPLACE_ME"
                }
            }
        }
    ]
}'
Session constraints
The payment component should be constrained to take payments on the merchant specified in the create payin config request.
JavaScript bundle
Load the Rainforest payment JavaScript bundle onto your page so that you can render the payment component.
<script type="module" src="https://static.rainforestpay.com/sandbox.payment.js"></script>
Developing locally?If you're testing your integration on an environment that does not use
localhostas the origin, you will need to first configure your browser to allow Rainforest to use secure web APIs, like cryptography, which are normally disallowed over an insecure connection. See our instructions for more detail.
Then render the payment component as HTML, providing the previously-created session_key and payin_config_id as attributes:
<rainforest-payment
    session-key="REPLACE_ME"
    payin-config-id="REPLACE_ME"
></rainforest-payment>
Content security policy (CSP)
Content Security Policy (CSP)If your webpage uses a Content Security Policy to control what code is allowed on the page, you must make changes to allow the Rainforest Components to load.
You will need to update your Content Security Policy for script-src and frame-src directives to include:
*.rainforestpay.com
Customize the component
Head over to the Component Studio for more attributes you can provide to customize the component's appearance and behavior.
Allowed methods
The payment methods available for use in the Payment Component can be configured via the allowed-methods prop. This prop is a comma separated, ordered list of payment methods to display from left to right.
<rainforest-payment
	session-key='REPLACE_ME'
	payin-config-id='REPLACE_ME'
	preview-features='ALLOWED_METHOD_BUTTONS'
+	allowed-methods='APPLE_PAY,PAYPAL_WALLET,CARD'
></rainforest-payment>
For example, if the allowed-methods prop is set to APPLE_PAY,PAYPAL_WALLET,CARD,ACH then the Payment Component will display the Apple Pay button first, the PayPal button second, and the Card button third.
Field defaults
Default account type
If processing ACH payments, the account type will be set to Checking by default when rendering the Payment Component. To change the default to Savings, add the field-defaults prop and set it to the following:
  <rainforest-payment
    session-key='REPLACE_ME'
    payin-config-id='REPLACE_ME'
    allowed-methods='CARD,ACH'
    field-defaults='{"ach": {"account_type": "SAVINGS"}}'
  ></rainforest-payment>
Default account purpose
If processing ACH payments, the account purpose will be set to Personal by default when rendering the Payment Component. To change the default to Business, add the field-defaults prop and set it to the following:
  <rainforest-payment
    session-key='REPLACE_ME'
    payin-config-id='REPLACE_ME'
    allowed-methods='CARD,ACH'
    field-defaults='{"ach": {"account_holder_type": "BUSINESS"}}'
  ></rainforest-payment>
Event listeners
Next, the payment component will emit the following events, if applicable.
Events
| Event | Description |
|---|---|
loading | The component is in the process of loading and validating the session and configuration. |
loaded | The component successfully loaded, visible, and ready to process a payment. Utilize this event if you want to show a loading indicator until the payment component is ready for input. |
valid | The payment form is valid |
invalid | The payment form is invalid |
config-update-accepted | The payin config or payment method config attribute change was accepted by the component and will be used to process the payment. |
config-update-ignored | The payin config or payment method config attribute change was not accepted by the component and the previous config will be used to process the payment. This is because the payment is already in flight. |
card-brand-updated | Emitted in response to the customer filling out the credit card number. The event payload will be a single string value representing the detected card brand, with possible values VISA, MASTERCARD, DISCOVER, AMERICAN_EXPRESS, OTHER or NONE. |
method-updated | Emitted in response to the customer selecting the payment method form displayed. The event payload is a single string value representing the selected payment method type, with possible values ACH or CARD. |
attempted | Submit button was clicked and a request will be made to process the payin. Additional event data is not included. |
error | An error has occurred. The event data will include information about the error. You can attempt to process the payin again with the same payin config. |
declined | Payin was declined. The event data will include information such as the payin_id. You can attempt to process the payin again with the same payin config. |
approved | Payin was successfully processed. The event data will include information such as the payin_id. |
Listen for events
In order to receive events, add an identifier to the Payment Component:
  <rainforest-payment
    id='payment-component'
    session-key='REPLACE_ME'
    payin-config-id='REPLACE_ME'
    allowed-methods='CARD,ACH'
  ></rainforest-payment>
Add an event listener for each event:
const component = document.getElementById('payment-component');
component.addEventListener('approved', function (data) {
    // Save the payin_id from the data and redirect your user
});
component.addEventListener('declined', function (data) {
    // Allow the user to attempt another payin
});
Get result of payin
You should add an event listener to the following events:
approveddeclinederror
One of the above events will be emitted after the User clicks the "pay" button and the payin processes or fails.
The approved event will include the payin_id and all details returned on the get payin endpoint. You should store the payin_id in your system and redirect the user to your own receipt page, or utilize the receipt component.
Listen to webhooks
You should also listen to the payin webhooks to know when a payin processes and receive more details. If the payin succeeds, then a payin.processing webhook will fire. If the payin declines, then a payin.failed webhook will fire.
Working with webhooksSee the payin webhooks for the various webhooks you can subscribe to and the webhooks overview for an introduction to configuring webhook listeners and validating webhook payloads.
Sandbox simulation
Payin statuses
Utilize our test ACH accounts and cards to simulate an approval or decline when processing a payin.
Deposit and payments to succeeded
In Production, a payin will stay in the Processing status until it is available for a merchant's deposit . This can take a variable amount of time, depending on your platform's risk policies, weekends and holidays, and other factors. See the deposit timing for payments guide to understand when payments move from Processing to Succeeded and are available for deposits.
In sandbox, time does not automatically pass, enabling you to test various payment flows on demand. Call the simulate merchant deposit creation endpoint for a merchant to test their next deposit. Simulating a deposit will do the following:
- Take all of the merchant's payins, refunds, and other payments in the
Processingstatus and move them to theSucceededstatus. - Process a Deposit that would be sent to the merchant.
Once the payments are in the Succeeded status, actions such as refunding can be taken on the payins.
Updated 6 months ago