
Payout Schedule Component
Embed the Rainforest Payout Schedule Component to schedule payouts inside your own experience
Early PreviewThis feature is currently in Beta. Please contact Rainforest support or your Platform Success Manager for more information on Payouts.
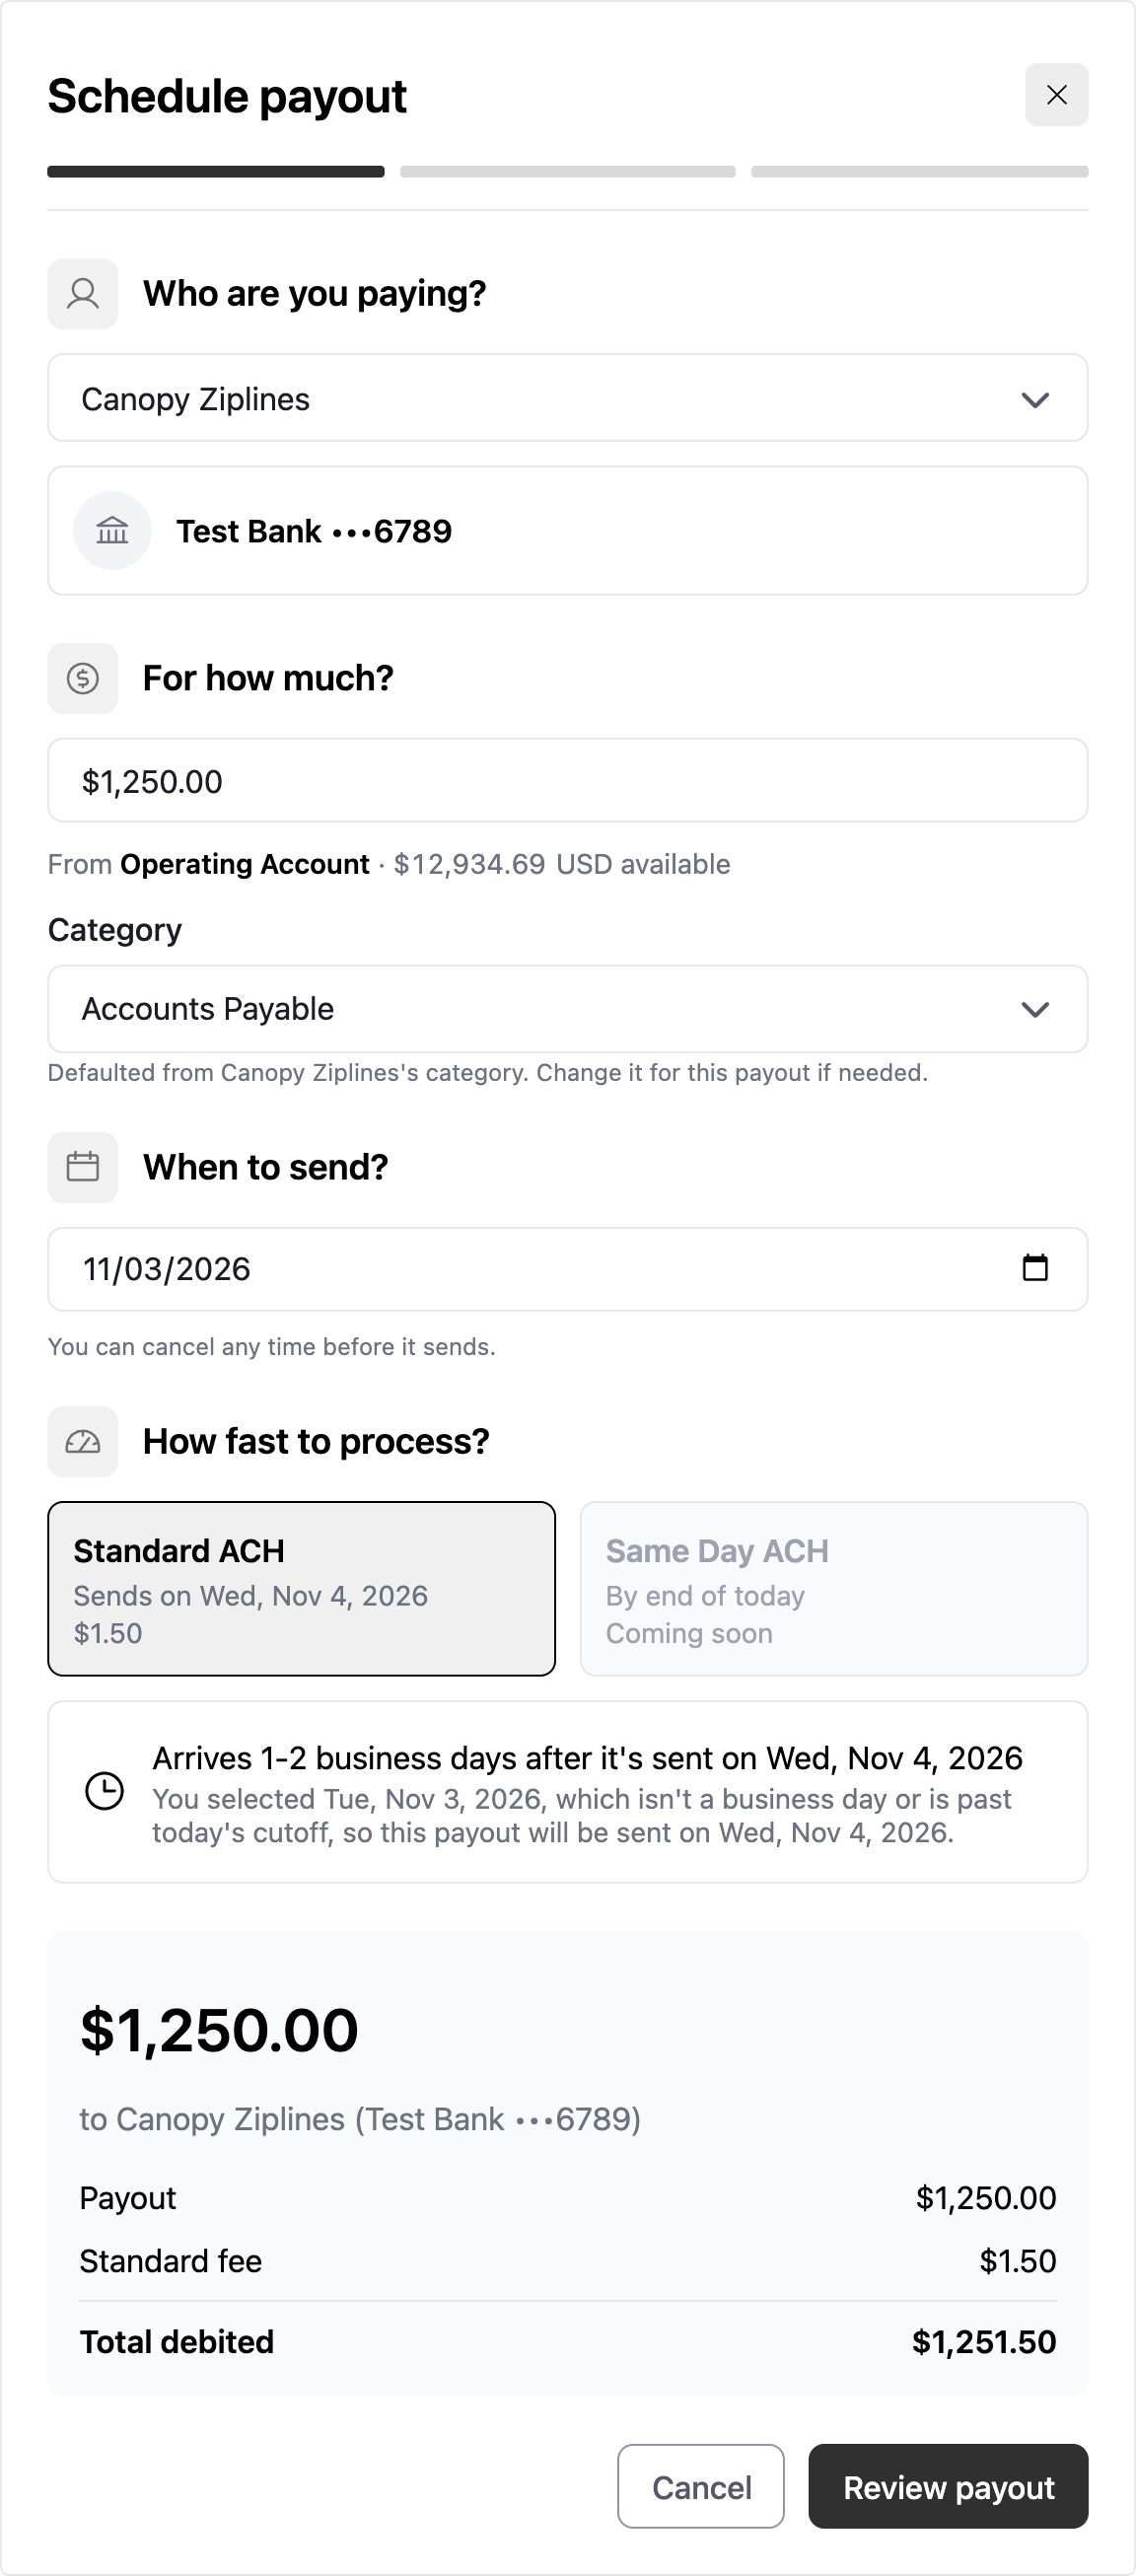
The Payout Schedule Component embeds just the flow to schedule a payout, so your platform can place it inside its own experience, such as a dialog or a step in your workflow. The merchant chooses who to pay, the amount, and the date to process the payout.
For how payouts work, see Payouts.
How to embed a Payout Schedule Component
Create the payout config
Unlike the Merchant Account Component and the Payout Report Component, the Payout Schedule Component does not create the payout config. Before you show the component, create a payout config for the merchant the payout is sent from, and pass the payout_config_id to the component.
A payout config can only be associated to one active payout, which is a payout in the status of Scheduled, In Review, Processing, Succeeded, or Returned. If the payout is in the status of Failed or Canceled, then the payout config can be re-utilized to schedule a new payout.
Session authentication
Create a session to grant the Payout Schedule Component permissions to schedule a payout from the payout config. The session must be constrained to the merchant the payout is scheduled from, and include the payout_schedule_component permission group:
curl --location 'https://api.rainforestpay.com/v1/sessions' \
--header 'Content-Type: application/json' \
--header 'Authorization: Bearer {{api_key}}' \
--data '{
    "ttl": 86400,
    "statements": [
        {
            "permissions": [
                "group#payout_schedule_component"
            ],
            "constraints": {
                "merchant": {
                    "merchant_id": "REPLACE_ME"
                }
            }
        }
    ]
}'
JavaScript bundle
Include the merchant JavaScript bundle in your frontend to access the Payout Schedule Component.
<script type="module" src="https://static.rainforestpay.com/sandbox.merchant.js"></script>Content security policy (CSP)
Content Security Policy (CSP)If your webpage uses a Content Security Policy to control what code is allowed on the page, you must make changes to allow the Rainforest Components to load.
You will need to update your Content Security Policy for
script-srcandframe-srcdirectives to include:*.rainforestpay.com
Payout Schedule Component
Add the Rainforest Payout Schedule Component with custom configuration designed in the component studio.
<rainforest-payout-schedule
  session-key="REPLACE_ME"
  merchant-id="REPLACE_ME"
  payout-config-id="REPLACE_ME"
  schedule-view="embedded"
></rainforest-payout-schedule>
Customize the component
Head over to the Component Studio for more attributes you can provide to customize the component’s appearance and behavior.
Prop configuration
Rainforest supports prop attributes to configure the Payout Schedule Component with various functionality and styling. See the Component Studio for a full list of attributes and valid values.
Style
The component takes the same style-* attributes as all the other Rainforest components, such as style-accent-color, style-button-color, and style-font-family.
Payout receiver
Use payout-receiver-id to preselect the payout receiver, such as when the merchant schedules a payout from a payout receiver's details in your platform. The merchant can still choose a different payout receiver.
<rainforest-payout-schedule
    payout-receiver-id="REPLACE_ME"
></rainforest-payout-schedule>
When payout-receiver-id is not set, the payout receiver dropdown starts empty and the merchant chooses who to pay.
Schedule view
Use schedule-view to choose how the component is displayed.
| Value | Description |
|---|---|
overlay | Default. Floats over the component's positioned parent. |
fullscreen_overlay | Floats over the full page. Clicking outside the component emits the cancel event. |
embedded | Fills its container. Use it when your platform supplies its own frame, such as a dialog. |
<rainforest-payout-schedule
    schedule-view="embedded"
></rainforest-payout-schedule>
Event listeners
The Payout Schedule Component will emit the following events as the merchant interacts with it.
| Event | Description |
|---|---|
payout-scheduled | Merchant scheduled the payout. The component then shows a summary of the scheduled payout. |
submitting-change | The component started or finished submitting the payout. The event data is true while the payout is submitting and false once it is done. |
cancel | Merchant clicked outside the component to close it. Only emitted when schedule-view is fullscreen_overlay. |
You may listen for the events above as needed, such as to close your own dialog or move the merchant to the next step once the payout is scheduled. In the case of payout-scheduled, you can obtain the payout ID from the event data.
Avoid closing the component while a payout is submitting, so the payout finishes being created. Use submitting-change to disable your own close button until the event data is false.
Sample event listening
var component = document.querySelector('rainforest-payout-schedule');

component.addEventListener('payout-scheduled', function (event) {
    // Get the payout ID
    const [payoutId] = event.detail;
});

component.addEventListener('submitting-change', function (event) {
    // Disable your close button while the payout is submitting
    const [isSubmitting] = event.detail;
});

component.addEventListener('cancel', function () {
    // Close your dialog
});
Listen to webhooks
Subscribe to the payout webhooks to keep your platform in sync with the life cycle of each payout.
Sandbox simulation
In the Sandbox environment, payments and payouts do not move on an automatic schedule, which allows you to have more control over testing.
To test the Payout Schedule Component in Sandbox:
- Activate the payout receiver. A third-party payout receiver stays Verifying in Sandbox after they are submitted. Move them to Active via the simulate payout receiver endpoint. A merchant paying themselves is already Active.
- Make funds available. Simulate the merchant's payments completing via the simulate merchant complete payments endpoint. This transitions all the merchant's payments with the status of Processing to Succeeded, so the funds are in the merchant's available balance.
- Schedule the payout. Create a payout config and schedule the payout from the Payout Schedule Component.
- Simulate the payout status. Move the payout through its statuses via the simulate payout status endpoint: Processing, Succeeded, Failed with a failure code, Returned with an ACH return code, or Canceled. This allows you to test all webhooks for payouts that you will receive in Production.
Updated about 6 hours ago